Ever wanted to run a local HTML project—like a personal dashboard, a simple tool, or a kiosk display—as a real, standalone desktop app? With a tool called Nativefier, you can bundle your entire project into a single executable (.exe) file. In this tutorial, you will learn to convert html to exe within minutes.
This guide will walk you through the correct and most reliable process. To ensure your app can load all its assets like CSS, JavaScript, and images without any issues, we’ll first serve the files on a temporary local web server before packaging them.
Step 1: Get Your System Ready with Node.js 💻
First things first, your system needs Node.js and its package manager, npm. This is a quick, one-time setup.
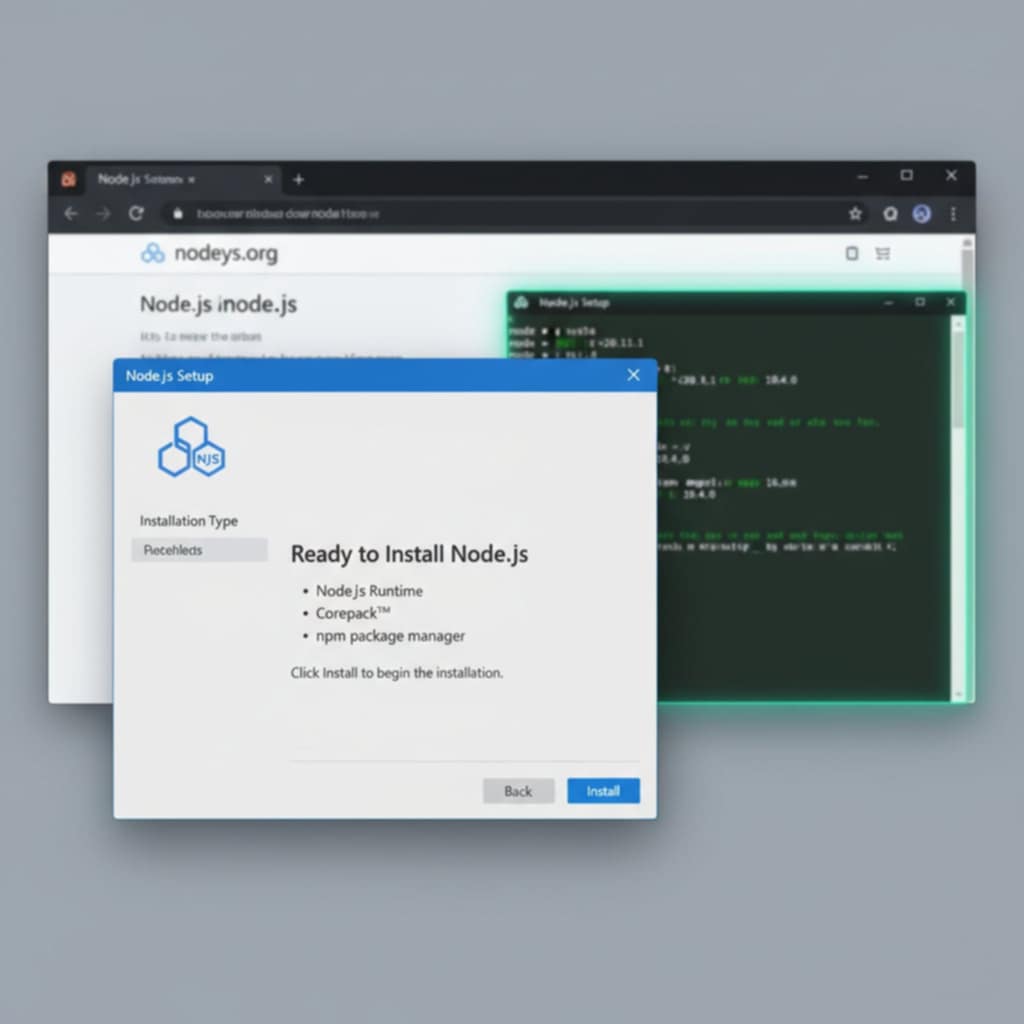
- Download Node.js: Head over to the official nodejs.org website.
- Install the LTS Version: Click the button for the LTS (Long Term Support) version. Run the installer and simply click “Next” through all the prompts—the default settings are perfect.
- Verify it Worked: Open your Command Prompt or Terminal. Run the following commands one at a time to ensure they were installed correctly.
Check the Node.js version:
node -vCheck the npm version:
npm -vIf you see version numbers for both, you’re ready to move on!
Step 2: Install Nativefier and http-server
Next, we’ll install the two command-line tools we need. We’ll install them globally so you can use them from any folder on your computer.
- Open Command Prompt as an Administrator. (Search for
cmd, right-click it, and select “Run as administrator”). - Install Nativefier: This is the tool that builds the application.
npm install -g nativefierInstall http-server: This is the tool that will create our temporary web server.
npm install -g http-serverStep 3: Serve Your Project Locally 🚀
This is the key step to ensure your app works flawlessly. By running a local server, Nativefier can access your files via http:// just like a real website, preventing common errors.
- Organize Your Project: Make sure your
index.htmlfile and all its assets (e.g.,styles.css,script.js, andimagesfolder) are together in a single folder. - Navigate to Your Project Folder: Open a regular Command Prompt (no admin needed) and use the
cdcommand to move into your project folder.
cd C:\Users\YourName\Desktop\MyWebApp(Remember to replace YourName and the path with your own).
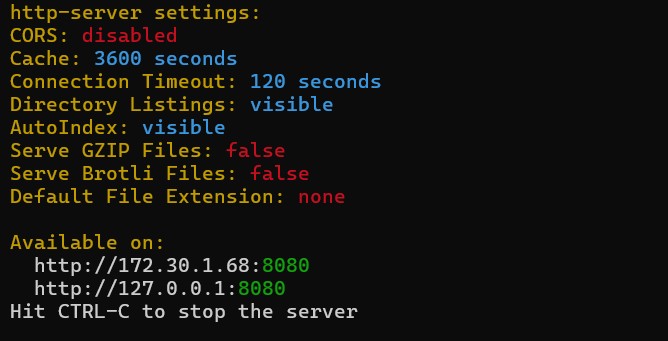
Start the Server: Now, run the http-server command.
http-serverGet the Local Address: The server will start and show you a list of URLs. Copy one of the http://127.0.0.1 or http://localhost addresses (they usually end in :8080).
IMPORTANT: Leave this Command Prompt window open! The server must keep running while we build the app.
Step 4: Build the App with Nativefier (html to exe) 🛠️
With your local server running, we can finally package the app and convert html to exe
- Open a NEW Command Prompt Window. (This is crucial, as your first one is busy running the server).
- Run the Nativefier Command: In this new terminal, run the
nativefiercommand. Be sure to use the localhost URL you copied from the server, not the filename.
nativefier --name "My Web App" "http://127.0.0.1:8080"Nativefier will now connect to your local server, download all the content, and package it into a desktop application. This may take a minute or two.
Step 5: Finalize and Find Your App 🎉
Once Nativefier is finished, you can clean up.
- Stop the Server: Go back to your first Command Prompt window (the one running
http-server) and pressCtrl+Cto shut it down. You can now close that window. - Find Your App: Look inside your original project folder. You’ll see a new folder named something like
My Web App-win32-x64. Inside, you’ll find theMy Web App.exefile.
That’s it! You have successfully converted your html to exe file. You now have a working, standalone Windows application created from your HTML project.
Pro Tip: Add a Custom Icon
To make your app look more professional, you can add a custom icon. You’ll need an .ico file for Windows. Just add the --icon flag to the build command:
nativefier --name "My Web App" --icon "C:\path\to\your\icon.ico" "http://127.0.0.1:8080"[Beyond this Tutorial
If you’re setting up new developer accounts or cleaning up your digital workspace, you might also find our guide on Changing your Primary Gmail Address helpful—no new account required!]