Tired of clicking through menus to find your favorite apps? In Windows 11, you can launch any application with a simple key press by creating a custom keyboard shortcut. This guide will show you how to set up these time-saving shortcuts in just a few easy steps.
Let’s get your most-used programs just a keystroke away!
Step 1: Create a Shortcut on Your Desktop
First, you need a desktop shortcut for the app you want to open. If you already have one, you can move on to Step 2.
- Click the Start Menu icon on your taskbar.
- Select the “All apps” button in the top-right corner.
- Scroll through the list to find the application you want.
- Click and drag the app icon directly from the menu and drop it onto your desktop.

You now have a shortcut on your desktop, which is the key to the next step.
Step 2: Assign Your Custom Keyboard Shortcut
Now we’ll assign a unique key combination to the new shortcut.
- Right-click on the desktop shortcut you just created.
- Select Properties from the bottom of the menu.
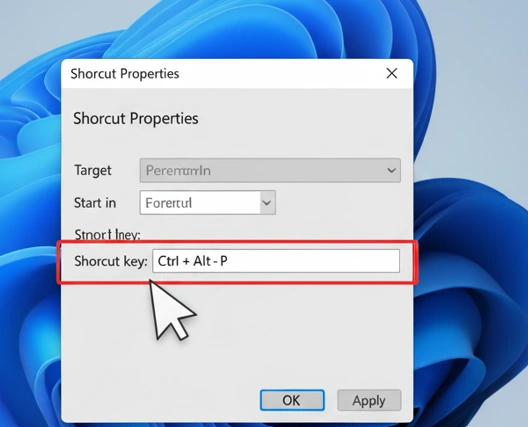
- In the Properties window, make sure you are in the “Shortcut” tab.
- Click inside the text box labeled “Shortcut key”. It will currently say “None”.
- Press the key combination you want to use. While Windows defaults to Ctrl + Alt if you only press a single letter (e.g., pressing P becomes Ctrl + Alt + P), you can create other combinations. For instance, hold down Ctrl + Shift and then press your desired key, like P, to create the Ctrl + Shift + P shortcut.
- Click Apply, and then OK to save the change.
Step 3: Test Your New Shortcut!
That’s it! Press the keyboard shortcut you just created (e.g., Ctrl + Shift + P), and your application will launch instantly.
You can repeat this process for all your favorite apps to make your workflow much faster and more efficient.
Quick Tip: The keyboard shortcut will only work as long as the desktop icon exists. If you want a clean desktop, you can move the shortcut file into a different folder, and your key combination will still work perfectly.